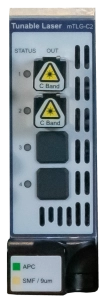
MAP (Mainframe/Module) | Silver-5 | Bronze-4 Bronze-5 | Silver-4 Silver-5 | no | Зачем калибровать этот продукт? Каковы распространенные проблемы? Why calibrate this product?It is essential in manufacturing environment to ensure your product meets the published/customer requirements. Having accurate measurements ensures highest possible yields whilst maintaining product specifications. Ensuring all that the optical test equipment is performing as designed and calibrated is requirement in achieving that goal. Viavi will validate measurement accuracies conform to published specifications. Maintain connectors and pigtails. Factory standards to ensure accuracyVIAVI is a TL9000 company and calibrates this instrument based on general requirements for the competence of calibration and testing laboratories (ISO/IEC 17025:2005) to ensure your instrument is certified to measure accurately. Instruments that are out of calibration will produce unreliable measurements and can create false passing or false failing test results that often cause your team repeat work. We maintain, polish and clean all fiber connectors, fix pigtail connections that are internal to the product to ensure all parts stay in good working order and upgrade software / firmware to the latest approved release to enable enhancements. VIAVI Care Plans are the most cost-effective way to plan for calibration with a low, discounted price at the time of instrument purchase. Fixed rate calibration can also be purchased later via a separate purchase order. - Ensure accurate measurements that meet design expectations and optical budgets.
- Maintain ports and connectors to keep signals working properly and to extend the life of the instrument. For example, if optical connectors or lasers are bad or interface ports are loose then after repeated connection cycles, optical measurements may be inaccurate or damage may occur.
- When manufacturing optical network products, accurate, reliable and repeatable optical measurement performance is essential to compliance with published/committed product specifications
- Know that optical product design, product manufacturing and customer expectations are accurate and in alignment throughout product lifecycle
How will my measurements be affected if the product is out of calibration?Inaccurate measurements may prevent verification of power levels or introduce other measurement uncertainties, errors and artifacts. Out-of-calibration instruments can result in design errors, production problems, end customer escalations, increased failure rates, audit non-compliance or even ultimately loss of business. What are the most common implications of these issues to the business?Uncalibrated tools produce unreliable measurement results that can't be certified to specifications and may violate product agreements or ISO/TL9000 standards with your customers and their network equipment vendors. Design errors resulting from inaccurate measurements can result in ongoing issues throughout the product lifecycle including poor yields, inaccurate optical budgets, increased return rates and customer expectation mismatch. Production costs can be elevated by increased re-work, reduced yield and inconsistencies between measurements.
Common Business impacts include: - Lost revenue, customer complaints and increased costs.
- Quality audit failures.
- For end customers, repeat product quality issues with vendors often cause added cost, customer dissatisfaction and loss of business.
|
MAP Matrix Switch (OST, OSM, VST) | Bronze-5 | Bronze-2 Bronze-3 Bronze-4 Bronze-5 | no | no | Зачем калибровать этот продукт? Каковы распространенные проблемы? Why calibrate this product?It is essential in manufacturing environment to ensure your product meets the published/customer requirements. Having accurate measurements ensures highest possible yields whilst maintaining product specifications. Ensuring all that the optical test equipment is performing as designed and calibrated is requirement in achieving that goal. Viavi will validate measurement accuracies conform to published specifications. Maintain connectors and pigtails. Factory standards to ensure accuracyVIAVI is a TL9000 company and calibrates this instrument based on general requirements for the competence of calibration and testing laboratories (ISO/IEC 17025:2005) to ensure your instrument is certified to measure accurately. Instruments that are out of calibration will produce unreliable measurements and can create false passing or false failing test results that often cause your team repeat work. We maintain, polish and clean all fiber connectors, fix pigtail connections that are internal to the product to ensure all parts stay in good working order and upgrade software / firmware to the latest approved release to enable enhancements. VIAVI Care Plans are the most cost-effective way to plan for calibration with a low, discounted price at the time of instrument purchase. Fixed rate calibration can also be purchased later via a separate purchase order. - Ensure accurate measurements that meet design expectations and optical budgets.
- Maintain ports and connectors to keep signals working properly and to extend the life of the instrument. For example, if optical connectors or lasers are bad or interface ports are loose then after repeated connection cycles, optical measurements may be inaccurate or damage may occur.
- When manufacturing optical network products, accurate, reliable and repeatable optical measurement performance is essential to compliance with published/committed product specifications
- Know that optical product design, product manufacturing and customer expectations are accurate and in alignment throughout product lifecycle
How will my measurements be affected if the product is out of calibration?Inaccurate measurements may prevent verification of power levels or introduce other measurement uncertainties, errors and artifacts. Out-of-calibration instruments can result in design errors, production problems, end customer escalations, increased failure rates, audit non-compliance or even ultimately loss of business. What are the most common implications of these issues to the business?Uncalibrated tools produce unreliable measurement results that can't be certified to specifications and may violate product agreements or ISO/TL9000 standards with your customers and their network equipment vendors. Design errors resulting from inaccurate measurements can result in ongoing issues throughout the product lifecycle including poor yields, inaccurate optical budgets, increased return rates and customer expectation mismatch. Production costs can be elevated by increased re-work, reduced yield and inconsistencies between measurements.
Common Business impacts include: - Lost revenue, customer complaints and increased costs.
- Quality audit failures.
- For end customers, repeat product quality issues with vendors often cause added cost, customer dissatisfaction and loss of business.
|
MAP Tunable Source (mTLS) | Silver-5 | Bronze-2 Bronze-3 Bronze-4 Bronze-5 | Silver-2 Silver-3 Silver-4 Silver-5 | no | Зачем калибровать этот продукт? Каковы распространенные проблемы? Why calibrate this product?It is essential in manufacturing environment to ensure your product meets the published/customer requirements. Having accurate measurements ensures highest possible yields whilst maintaining product specifications. Ensuring all that the optical test equipment is performing as designed and calibrated is requirement in achieving that goal. Viavi will validate measurement accuracies conform to published specifications. Maintain connectors and pigtails. Factory standards to ensure accuracyVIAVI is a TL9000 company and calibrates this instrument based on general requirements for the competence of calibration and testing laboratories (ISO/IEC 17025:2005) to ensure your instrument is certified to measure accurately. Instruments that are out of calibration will produce unreliable measurements and can create false passing or false failing test results that often cause your team repeat work. We maintain, polish and clean all fiber connectors, fix pigtail connections that are internal to the product to ensure all parts stay in good working order and upgrade software / firmware to the latest approved release to enable enhancements. VIAVI Care Plans are the most cost-effective way to plan for calibration with a low, discounted price at the time of instrument purchase. Fixed rate calibration can also be purchased later via a separate purchase order. - Ensure accurate measurements that meet design expectations and optical budgets.
- Maintain ports and connectors to keep signals working properly and to extend the life of the instrument. For example, if optical connectors or lasers are bad or interface ports are loose then after repeated connection cycles, optical measurements may be inaccurate or damage may occur.
- When manufacturing optical network products, accurate, reliable and repeatable optical measurement performance is essential to compliance with published/committed product specifications
- Know that optical product design, product manufacturing and customer expectations are accurate and in alignment throughout product lifecycle
How will my measurements be affected if the product is out of calibration?Inaccurate measurements may prevent verification of power levels or introduce other measurement uncertainties, errors and artifacts. Out-of-calibration instruments can result in design errors, production problems, end customer escalations, increased failure rates, audit non-compliance or even ultimately loss of business. What are the most common implications of these issues to the business?Uncalibrated tools produce unreliable measurement results that can't be certified to specifications and may violate product agreements or ISO/TL9000 standards with your customers and their network equipment vendors. Design errors resulting from inaccurate measurements can result in ongoing issues throughout the product lifecycle including poor yields, inaccurate optical budgets, increased return rates and customer expectation mismatch. Production costs can be elevated by increased re-work, reduced yield and inconsistencies between measurements.
Common Business impacts include: - Lost revenue, customer complaints and increased costs.
- Quality audit failures.
- For end customers, repeat product quality issues with vendors often cause added cost, customer dissatisfaction and loss of business.
|